Hold down the Shift key and keep it down. Angle to whatever you want 0horizontal 90vertical and put the widthheight ration to the max.
Making Dotted Lines In Gimp Digital Imaging Youtube
Still after being annoyed by that little dotted line for so long I feel like getting rid of it is cause for celebration.
. Click on the guide where you want the first point of the segment then click on where you want the second point of the segment. A single dot will appear on the screen. Use the pencil tool select your newly created pencil and draw a straight line.
Now use Color to Alpha to remove the white background. This gives you a visual cue of the angle of the line. Release the Shift key after the line is drawn.
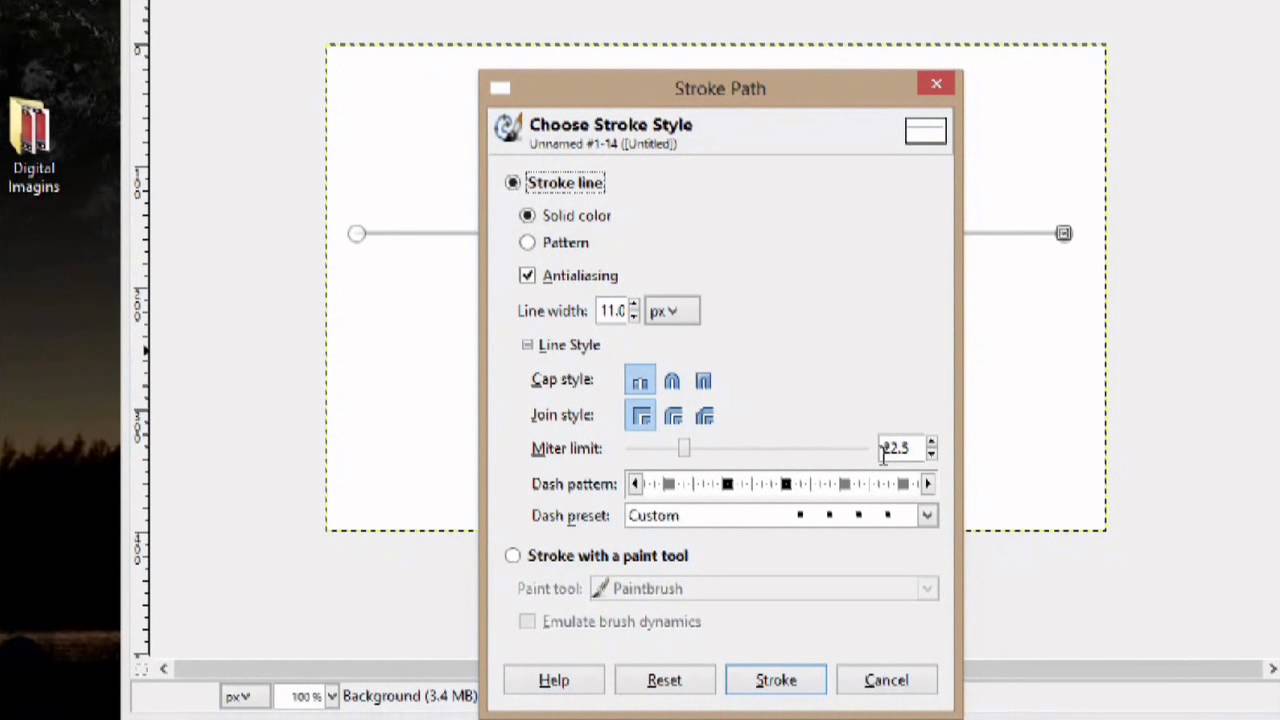
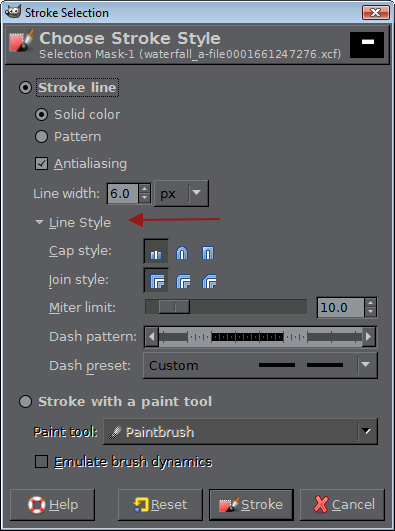
Any of the red-highlighted tools on the above toolbox can do lines. Now that we have a dedicated layer to draw our shape on Ill come over to the toolbox and will click on the Rectangle Select tool red arrow in the image above which you can also access using the shortcut key R on your keyboard. Set the line width and open the Line Styles option below that item.
I think a lot of the issue is just knowing that yellow dotted line in GIMP is called the Layer Boundary. Drawing the Line Figure 350. Next click again to create the endpoint.
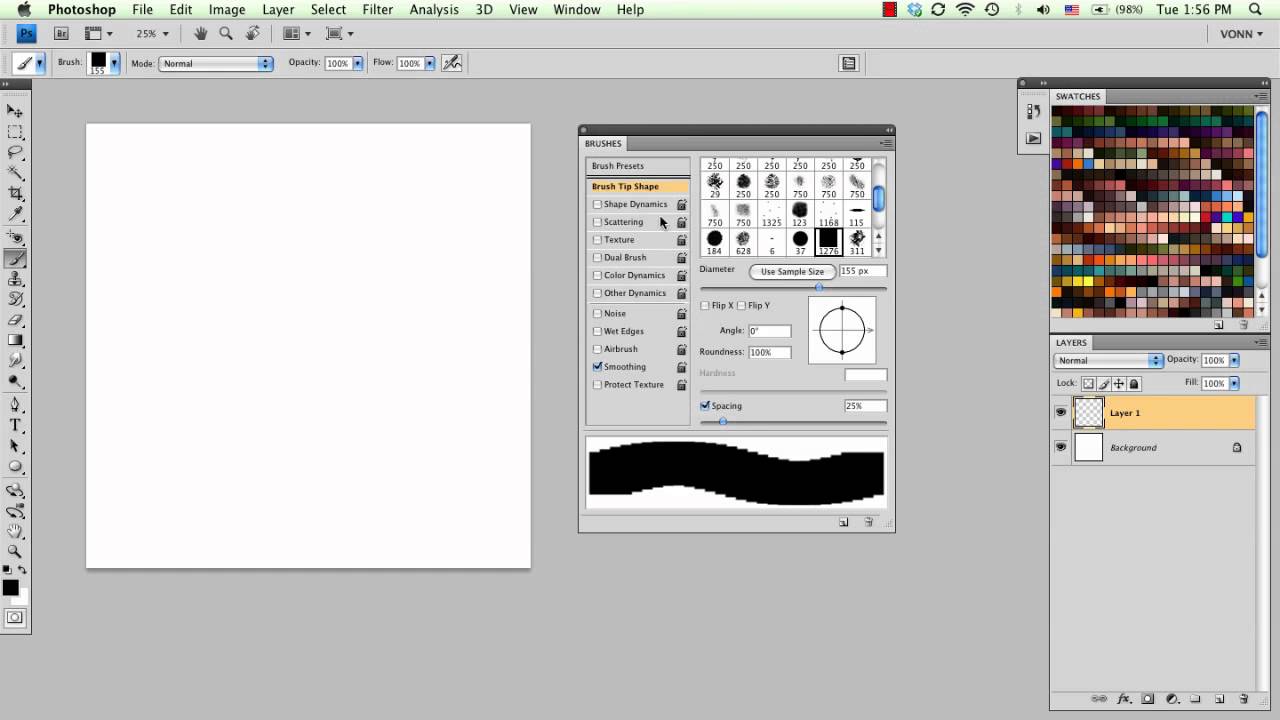
Drawing Dashed Lines new user question In the brush selection dialog select new and youll get a box showing a basic brush and 4 sliders. If you click on a black pixel you remove it from the dash. The guide will ensure the two points are aligned.
Click in the image where you want a line to start or end. The size of this dot represents the current brush size which you can change in the Brush Dialog see Section 32 Brushes Dialog Now lets start drawing a line. Any size will do.
Draw Your Rectangle Shape. Overwrite untitled with whathever name you want then close the editor. Click Shift for easy drawing Voilà dot magic.
Hold down the Shift key and click again to set the second point of your line. Here you will find settings for all manner of dots and dashes and such and a tool for making your own custom dot and dash patterns. Save your pencil and close the dialog.
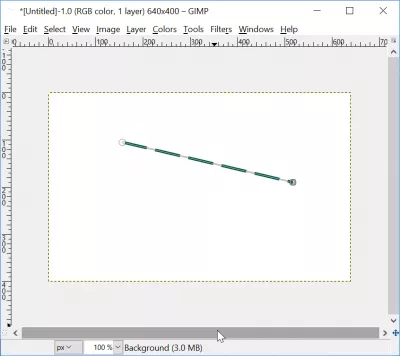
Gimp quick type how to make a dotted dashed line circle square rectangle in GIMP. You can draw a straight solid line in Gimp by clicking on the start point holding down the Shift key and clicking on the end point. If you click on a white pixel you add it to the.
Launch GIMP and open the document in which you want to draw a dotted line. The key here is to adjust the Interspacing slider at the bottom until theres enough space betwoon the dots. Step 3 After you click the paintbrush tool you can click the image.
Step 1 First create a new image. Click the endpoint this creates a straight line between the two points with your selected brush. In GIMP select your preferred brush tool click the point that begins your line hold the Shift key and drag your cursor to where you want the line to end.
If you are using GIMP 21018 or newer your tools will likely be. A single dot will appear on the screen. Click on View in the Main Menu and click Show Layer Boundary box to uncheck that option.
Click in the image where you want a line to start or end. A line will be drawn between the two places you clicked with your mouse button. When done click on Stroke Path in the tools pane and.
If it is black lines on a white background or dark lines on light background you can use Filters Generic Erode. Step 2 Then click on the paintbrush. Youll have to try this out to make sure.
Doesnt work on a transparent background. After the line is drawn release the Shift key. On the pixel level a dashed line is drawn as a series of You can modify the pattern of these boxes.
Angle to whatever you want 0horizontal 90vertical and put the widthheight ration to the max. Hold down the Shift key and click again to set the second point of your line. Select a pattern push the Stroke button at.
Heres how to use it. GIMP will automatically fill the. This works okay unless you want to draw a straight dashed line.
1 - The quick and dirty way This is fairly obvious - select the paint tool set the foreground colour and draw the dashed line freehand. Select and customize your brush then click once on your image to set the first point on your straight line Step 2. As you do youll see a straight guide line appear as you move the mouse.
Black area with thin vertical lines represents the pixels of the dash. But you can put a white background below the lines merge down and then use Erode.
Gimp Draw A Straight Line Or An Arrow

How To Square Up Photos In Gimp Carrie L Lewis Artist Photoshop Me Gimp Photoshop 7

Making Dotted Lines In Gimp Youtube

Making Dotted Lines In Gimp Youtube
Tip Creating A Dotted And Dashed Line In Photoshop And Gimp Youtube

Stipling An Image In Gimp Gimp Intermediate Colors Stippling
Gimp Chat Drawing Dotted Lines Using The Path Paintbrush Tools

Gimp Draw A Straight Line Or An Arrow Easy Tutorial Straight Lines Smooth Lines
0 comments
Post a Comment